
I have a terrible habit of scouring Craigslist for various things, and I know a secret: relative to Vancouver, the island just to the right of us (Vancouver Island, aka where Victoria and Nanaimo are) has a crappy, thinly traded used-goods market. Some specialty items, which might last mere hours on Vancouver Craigslist at the right price, are just available. And I have a relationship with a courier service that can ship very unreasonable things for less than the cost of a round-trip ferry ticket.
Anyway, local trivia aside, I’ve been using the plague as an excuse to rebuild my work-from-home espresso setup.
Any good coffee nerd will tell you when it comes to espresso, the grinder is as important as the machine. So I’ve prioritized finding a good one. Tolerable home-use grinders start at $300 or so, there’s good reasons to spend $500 on a new one, and the price only goes up from there. Sitting above even these, commercial grinders achieve surpassing grind accuracy and adjustability through the awesome power of being very heavy and very well-built. They’re priced accordingly: figure $1000 for a terrible one, $2000+ for the fanciest commercial espresso grinders. While there are some compromises (grounds retention being the worst of these, but massive size is a close runner-up), a commercial grinder is a viable choice for the really obsessed coffee nerd, and sometimes they trade used for much less than new.
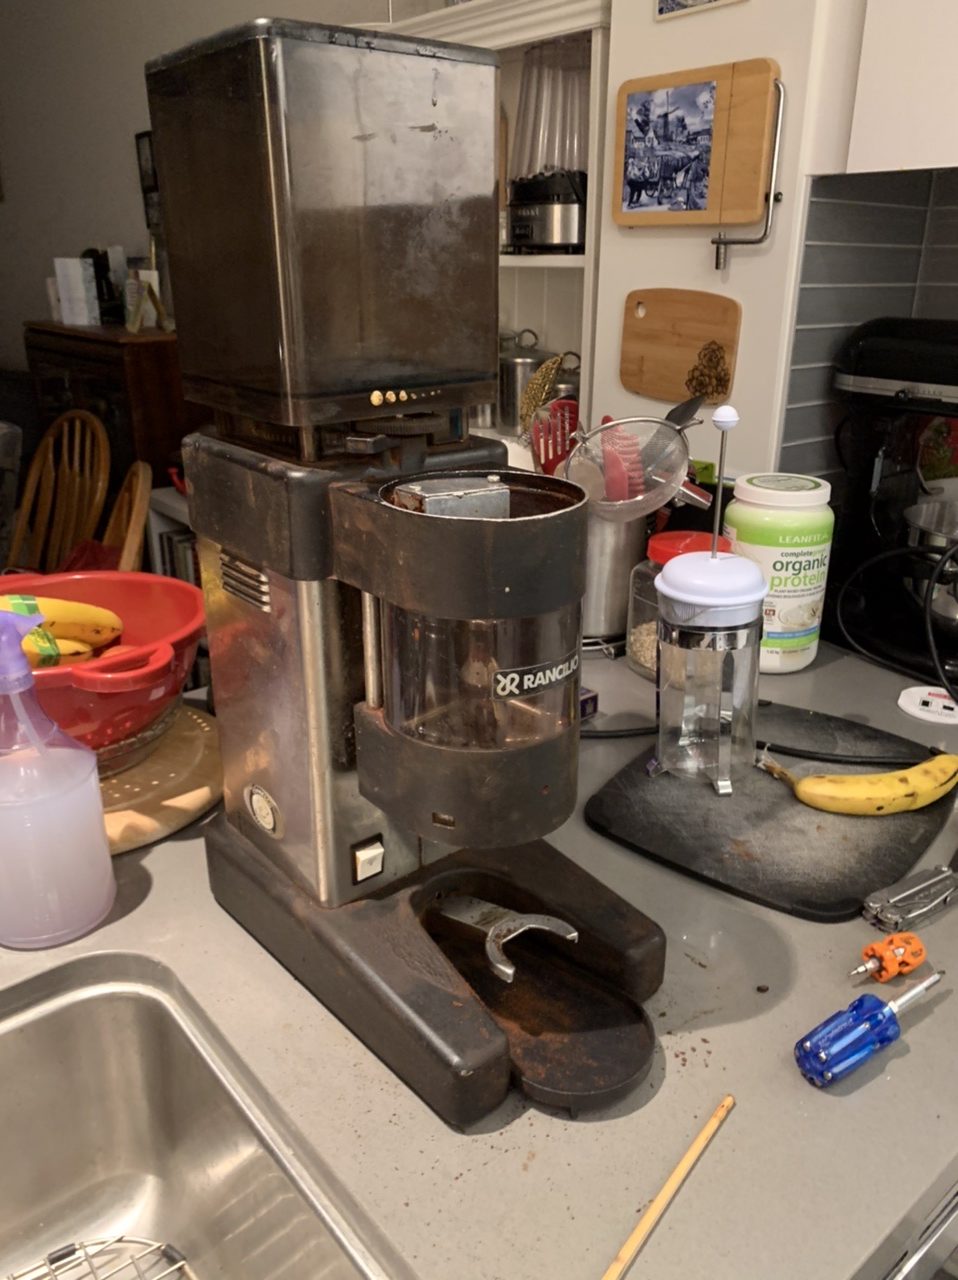
When a “commercial coffee grinder” was posted on Victoria Craigslist for $100, I looked at the photos, saw the word “Rancilio,” and hastily sent an email to the seller.
Rancilio makes a variety of well-regarded grinders, ranging from home machines to deadly serious commercial units. Further photos confirmed I was trying to buy a Rancilio MD 80 AT, a machine that sells for $1500 new, and was capable of grinding both accurately and in serious, ridiculous quantities. In terms of espresso grinders, with a few caveats it’s the last grinder anyone might ever need, and that applies whether you are a home hobbyist or a high-volume coffee shop (if you need more grinding capacity than an MD 80 can provide, then the standard solution is a second grinder).
Anyway, I bought it, and to my lovely bride’s bemusement, we now have a 40 pound grinder in our small kitchen. Unfortunately, the grinder came with a pound or two more of caked coffee crusted up everywhere coffee can crust, perhaps the reason the seller was willing to dump it cheap.
But the real public service I’m providing here is a quick guide to tearing down a Rancilio MD series grinder, since I can’t find one online.
Here’s a photo guide with some tips. This is the MD 80, but most of the info should be applicable to an MD 40 or MD 50.
This teardown doesn’t require any specialty tools. You will need a thin 10 mm socket, a ratchet driver, and an extension, some stubby Phillips screwdrivers, a fairly normal crescent wrench, a 6 mm hex wrench, and maybe some needlenose pliers, plus probably a slot screwdriver.
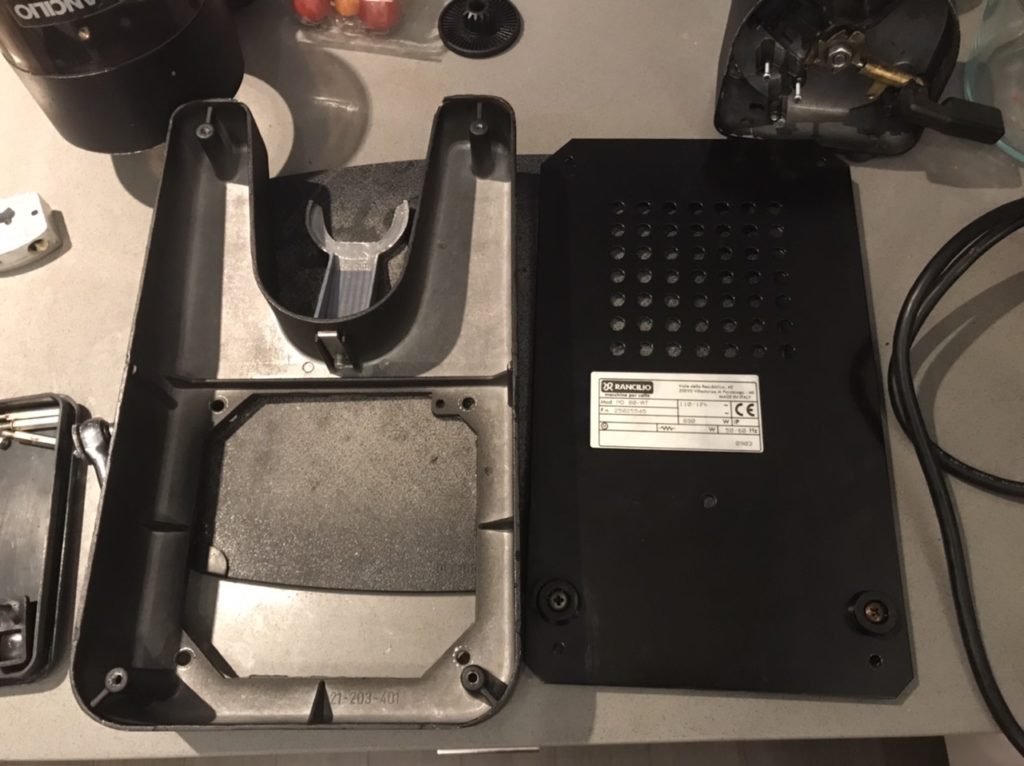
Start by taking off the hopper, and I also took off the plastic shield on the bottom of the doser, which you eventually need to do. Then attack the top. Pop the e-clip off the adjuster without flinging it halfway across your shop, then lift the plastic adjuster wheel up. The locking button will also be removable now, so remove those bits, and unscrew the hopper posts for safekeeping.

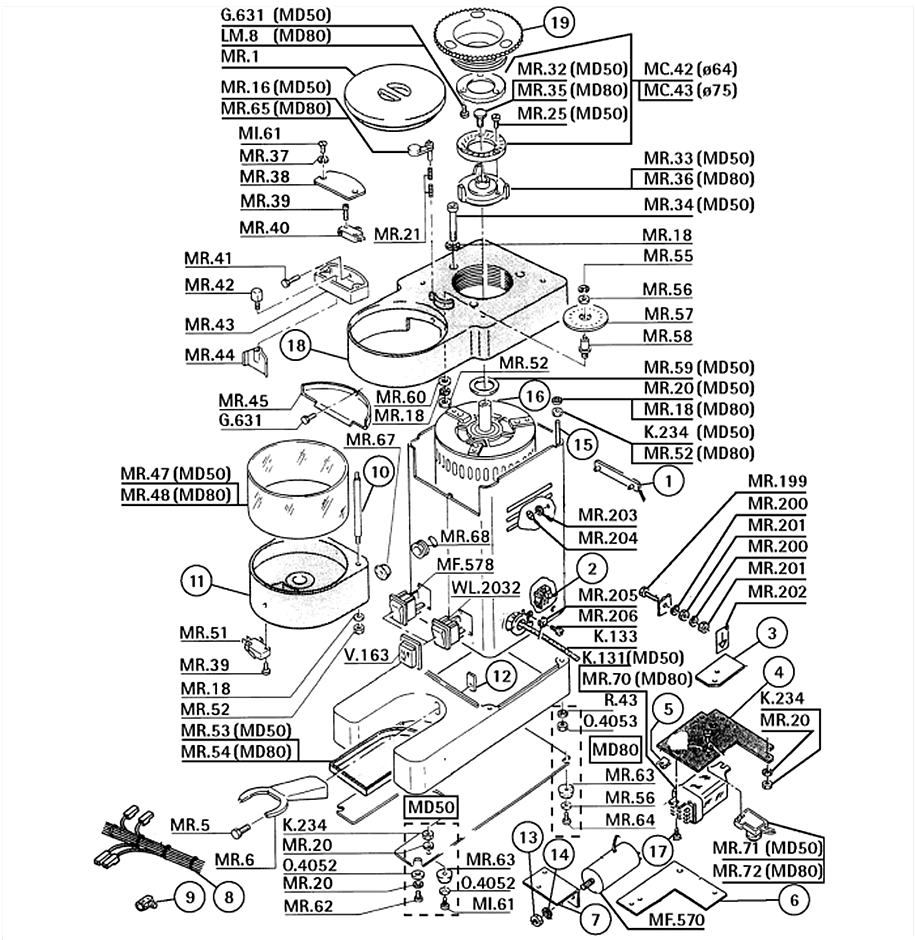
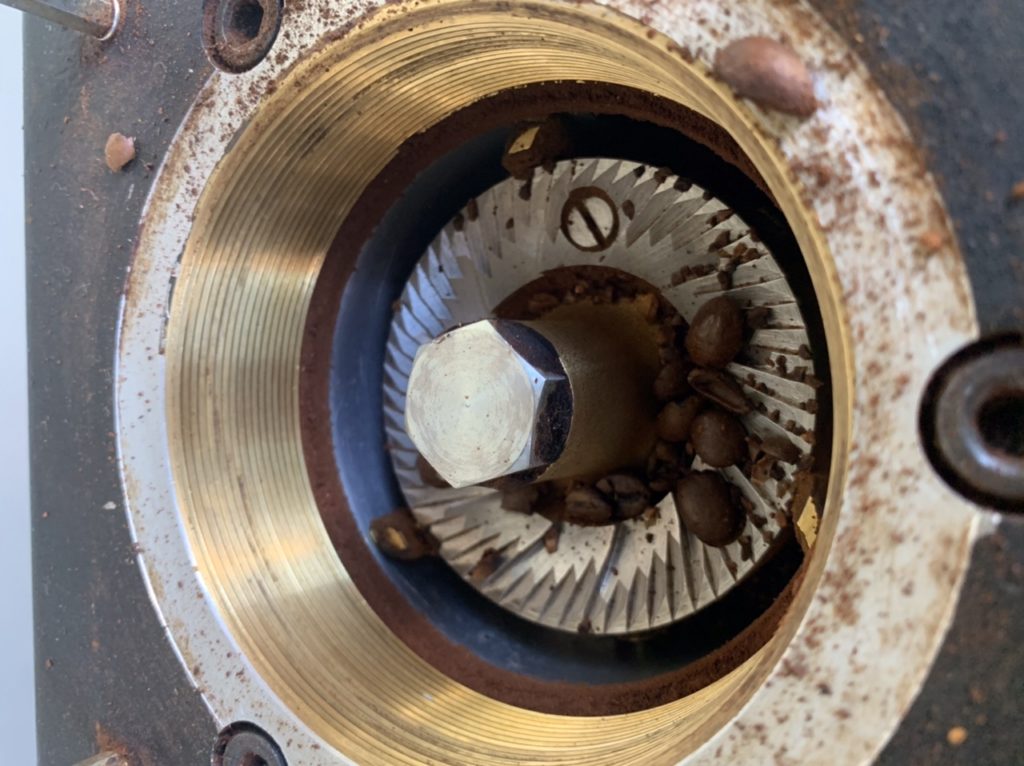
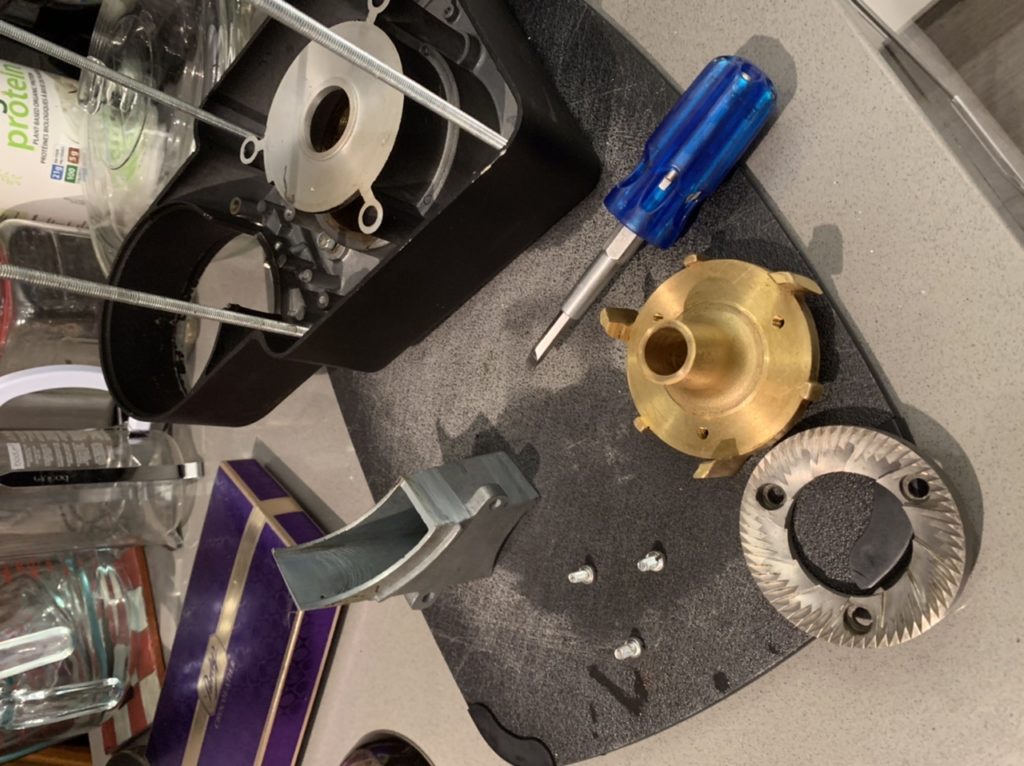
Next, unscrew the big upper burr carrier. It’s a lot of threads, but just keep unscrewing until it’s out. Set aside; no need to demount the burr unless you’re replacing it or want to clean really thoroughly.
Now, Let’s discuss how the grinder is put together. The cast upper frame is VERY firmly bolted to the motor casing, by those three large hex head bolts. The big bolt in the middle of the burr carrier (see photo above) is also blocking the separation of motor from upper frame, but we probably want to leave taking any of that part until the end, because there’s some danger of damaging things if you don’t handle the grinder carefully. HOWEVER, if at any time the motor is physically blocking your ability to get something apart, pulling those three hex bolts will get you some wiggle room.
Regardless, we need to tackle the base and the doser first. The bottom plate comes off after you unscrew the rear feet, and the screws ahead of the front feet. You can leave the front feet on.
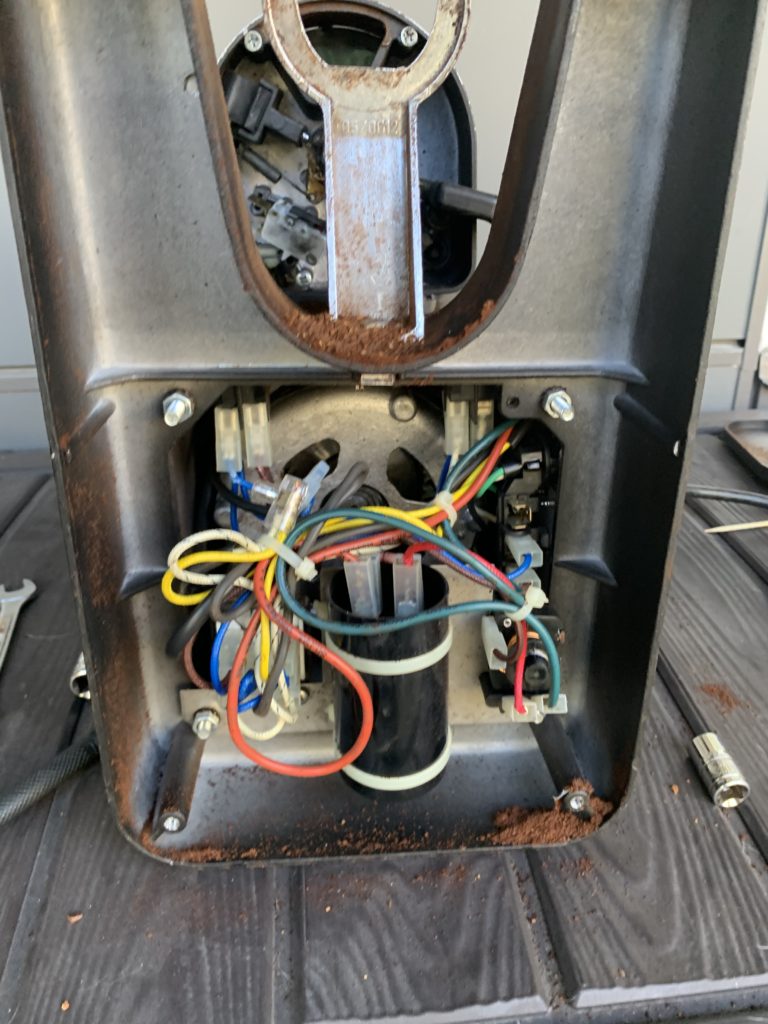
From here, unscrew the two screws holding the relay and other electrical bits in place, them unthread the nuts off the four long reddi-rod studs that go all the way to the top. I won’t describe the electrical connector steps in detail, but you do need to unplug several things to free them from the case at this point, including the two main switches. I recommend you take plenty of photos of the wiring, pop stuff out of the case as needed, and reconnect the elements to their wiring harnesses as soon as you free them, to avoid tragedy later.
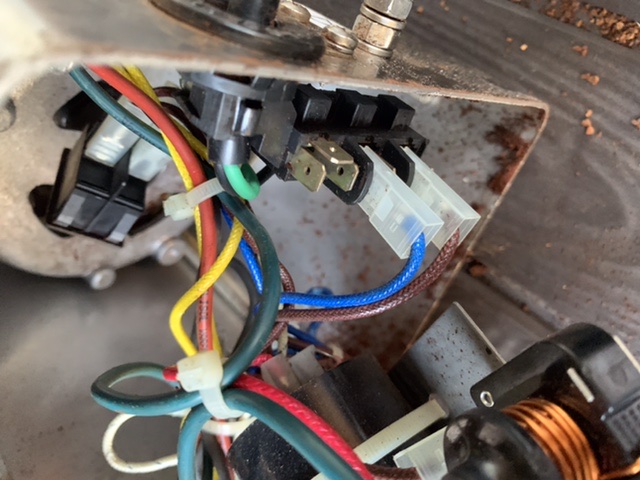
Once you have the wires disconnected, you can pull the base away, giving you access to the doser. The doser has a micro switch you have to disconnect and unrun the wires through the case hole. I couldn’t do this without stripping off one of the connector’s plastic insulators; I’ll replace it with electrical tape when I reassemble. Again, I removed the switch from the case and reconnected it to the freed wiring.
then there’s two nuts that hold the doser together, accessible from below. These thread onto the two long rods that are externally visible. With the nuts and their lockwashers off, you can unthread the rods by hand and remove them.
The doser modules will come out as whole pieces now, set them aside. If you want to take apart the doser, note that the nut on the bottom is holding the entire ratchet and dose-moving mechanism together, and it is reverse threaded. It’s holding a conical interface together, so once you get it loose, some persuasive tapping on the shaft will break everything loose, don’t wreck the threads.
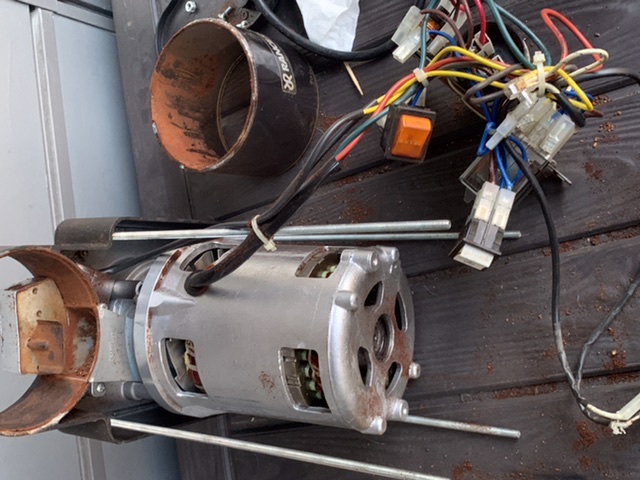
At this point you need to clear all the electrical wires from the stainless case, including ones in the doser switch at the TOP of the doser assembly. Once that is done, you should be able to pull the stainless outer case away. BEWARE: once that happens, the motor needs to be supported properly lest it damage things, especially the four long reddi-rods.
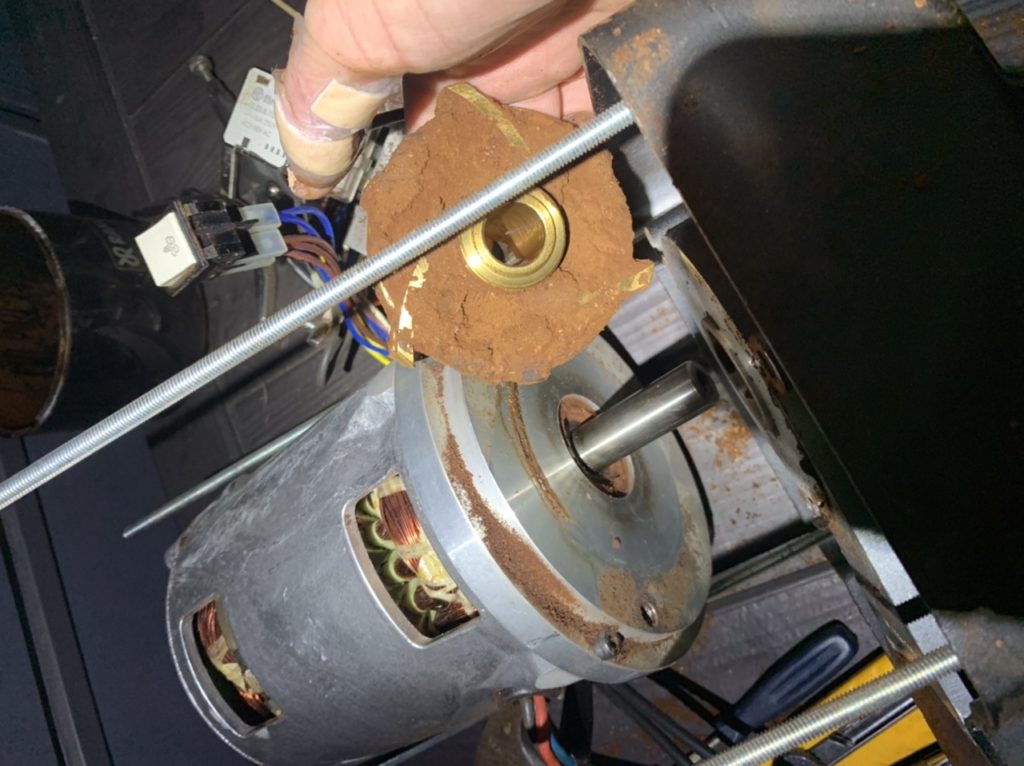
Next, you will want to gently jam something through the hopper outlet so that it stops the brass burr carrier (and the motor) from turning. Once you have done that, you can unscrew the big top bolt, and pull it free. You may have to unbolt the hex bolts and use a bit of levering between the motor and the upper frame to loosen the brass burr carrier off the shaft, but it’s not a tapered shaft, only a little effort should be needed.
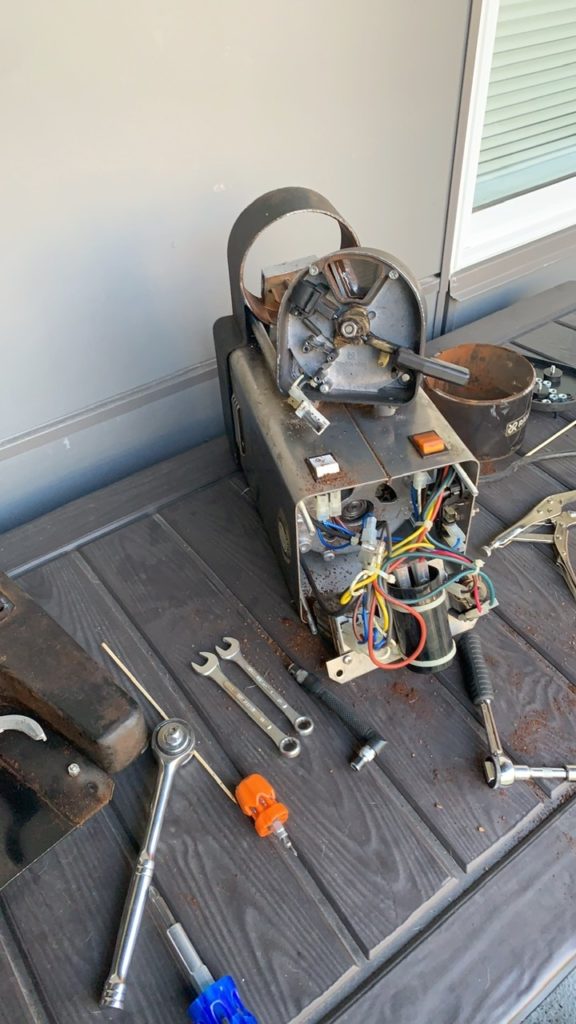
At this point all the major assemblies are free of each other, and if like me you took your grinder apart to clean it out, you will be able to clean away. Assembly is the reverse of this procedure, of course, and I hope your grinder is much cleaner than mine was.
At this point I’ve examined de-dosering the machine. The MD series really wants to keep its doser, but I think with a bit of creativity I can get the lower doser assembly off, and replace it with a fudge funnel for the classic de-dosering move. It may never have great self-emptying, but I can live with that; I have done so before. I also saw a note elsewhere that the bean hopper can easily be cut down to a smaller size, but I’m using it with no hopper, and instead a little steel cup serves to keep curious fingers away from the burrs. The AT models like mine also include a bunch of mechanisms that allow the doser to auto-fill when it gets low, a system totally unnecessary in my house, so I may have to re-wire that away if I de-doser it.
As for maintenance on these machines, there is not much. Burrs eventually wear, but you do not have to disassemble the machine very much to change them, just unscrew the top carrier, about a five minute job. I didn’t get into the motor, but it’s obviously a serious piece of kit. My guess is that you’ll never need to touch it, but it should be rebuildable. The upper bearing plate is machined aluminum, definitely not a typical motor mount. The brass parts of the doser show some signs of wearing in, but not wearing out. My machine has damage to the grinding chamber that looks like something harder than coffee got in; apparently the typical contaminant is a stone, riding along with your bag of whole beans. Cleaning is the key: if you stay on top of the basic cleanliness of a grinder like this, especially the doser, it should never get to this state.
Anyway, if, like me you enjoy repurposing commercial equipment inappropriately, I hope this guide to tearing down a Rancilio MD grinder is informative.